Rear Wheel Bearing Removal: A Step-by-Step Guide for Ohitsrachel Mega Fans
Are you a dedicated Ohitsrachel mega fan and also a car enthusiast? Then you've come to the right place! This comprehensive guide will walk you through the process of removing a rear wheel bearing, a task that might seem daunting, but is achievable with the right tools and instructions. While Ohitsrachel might be known for her other talents, we're here to empower you with automotive know-how.
This guide is designed for informational purposes only. Always prioritize safety and consult a professional mechanic if you're unsure about any step.
Why Remove a Rear Wheel Bearing?
Before diving into the removal process, let's understand why you might need to remove a rear wheel bearing. Common indicators include:
- Grinding or humming noises: A failing bearing often emits a distinct grinding or humming sound, especially when driving at higher speeds.
- Vibration in the steering wheel or vehicle: A damaged bearing can cause noticeable vibrations felt throughout the car.
- Wobbly wheel: Excessive play or looseness in the wheel is a clear sign of a problem.
- Uneven tire wear: A faulty bearing can lead to irregular tire wear patterns.
Tools You'll Need:
Before you start, gather these essential tools:
- Jack and jack stands: Safety first! Properly secure your vehicle.
- Wheel chocks: Essential for preventing accidental movement.
- Lug wrench: To remove the wheel.
- Socket set and ratchet: For various bolts and nuts.
- Hammer: May be needed to loosen stubborn parts.
- Pry bar: Can help with stubborn components.
- Penetrating oil: To loosen rusted or seized parts.
- Bearing puller: A specialized tool for safely removing the bearing. Different types exist, so choose one compatible with your vehicle.
- New rear wheel bearing: Always replace with a high-quality part.
- Torque wrench: Crucial for tightening bolts to the manufacturer's specifications.
- Gloves and safety glasses: Protect yourself from injury.
Step-by-Step Rear Wheel Bearing Removal:
(Remember: Consult your vehicle's repair manual for specific instructions and torque specifications.)
-
Secure the Vehicle: Safely jack up the vehicle and place it on jack stands. Use wheel chocks on the opposite wheels for added safety.
-
Remove the Wheel: Unscrew and remove the lug nuts, then take off the wheel.
-
Remove the Brake Caliper: Carefully remove the brake caliper and secure it out of the way. (Remember to support the caliper with a wire or bungee cord to prevent strain on the brake line.)
-
Remove the Rotor/Drum: Depending on your vehicle, you'll either have a rotor (disc brakes) or a drum (drum brakes). Remove the rotor or drum.
-
Remove the Axle Nut: Locate and carefully remove the axle nut. This may require significant force and the use of a breaker bar.
-
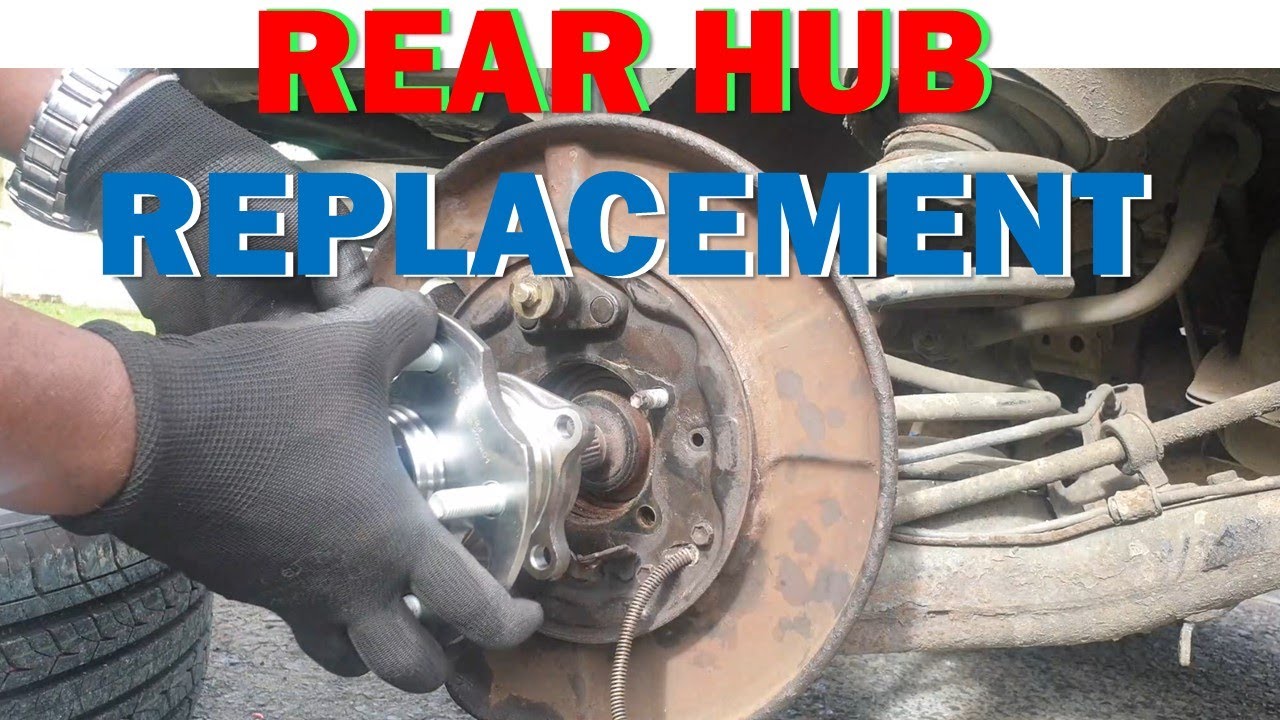
Separate the Hub and Bearing Assembly: This step can vary depending on the vehicle's design. You may need to use a pry bar or bearing puller to separate the hub from the axle.
-
Remove the Bearing: Use the bearing puller to carefully remove the rear wheel bearing from the hub assembly. This requires precision to avoid damaging the hub.
-
Clean and Inspect: Clean the hub assembly thoroughly, inspecting for any damage before installing the new bearing.
Installing the New Bearing:
The installation process is generally the reverse of the removal process. Remember to follow the instructions in your vehicle's manual for proper torque specifications when reassembling everything.
Important Considerations:
- Vehicle-Specific Instructions: This guide provides a general overview. Always refer to your vehicle's repair manual for specific steps and torque specifications. Improper installation can lead to damage and safety risks.
- Professional Help: If you're uncomfortable with any step, don't hesitate to seek professional help from a qualified mechanic.
- Safety First: Prioritize your safety throughout the entire process. Use proper safety gear and always secure the vehicle properly.
This detailed guide helps Ohitsrachel mega fans (and car enthusiasts in general) successfully tackle rear wheel bearing removal. Remember to always prioritize safety and consult your vehicle's manual for specific instructions. Happy wrenching!

