How to Create a Perfect Cash App Screenshot Showing Money: A Guide for Proof & Privacy
Need to share a Cash App screenshot to prove a payment or transaction? Getting it right is crucial, balancing the need for proof with protecting your sensitive information. This guide will walk you through creating a perfect Cash App screenshot, ensuring you share only what's necessary while maintaining your privacy.
Why Perfect Cash App Screenshots Matter
Sharing Cash App screenshots is common for various reasons:
- Proof of Payment: Showing a client, friend, or family member that you've sent or received money.
- Dispute Resolution: Providing evidence to Cash App support or a third party in case of a problem.
- Social Media Sharing: (Use caution!) Showing off a generous gift or payment (but always obscure sensitive data).
However, sharing a screenshot carelessly can expose personal information. A perfect screenshot prioritizes showcasing the relevant transaction details while safeguarding your privacy.
Creating the Perfect Cash App Screenshot: A Step-by-Step Guide
Follow these steps to create a secure and informative Cash App screenshot:
-
Locate the Transaction: Open your Cash App and find the specific transaction you want to screenshot.
-
Privacy First: Before taking the screenshot, carefully assess what information needs to be visible. You'll want to clearly display:
- Transaction Amount: This is the most important piece of information.
- Transaction Type: (Sent or Received)
- Date and Time: This provides context for the transaction.
-
Hide Sensitive Information: Be meticulous in obscuring any unnecessary details:
- Full Cashtag: Only reveal a portion of your Cashtag or the recipient's Cashtag, if necessary.
- Account Balance: Completely block out your current balance.
- Full Name: Don't share your full name or the full name of the recipient.
- Transaction ID: While useful for support, consider its necessity before including it.
-
Take the Screenshot: Use your device's built-in screenshot function. Many phones allow you to edit the screenshot immediately after capturing it.
-
Edit (Optional): Use a photo editing app (many are free) to further obscure sensitive information. You can:
- Crop the Image: Focus solely on the relevant transaction details.
- Use the Blur Tool: Blur out any sensitive sections you might have missed.
- Use the Redaction Tool: Cover sensitive data with black boxes.
-
Share Carefully: Only share the screenshot with the intended recipient(s). Avoid posting it publicly unless you've thoroughly obscured all sensitive data.
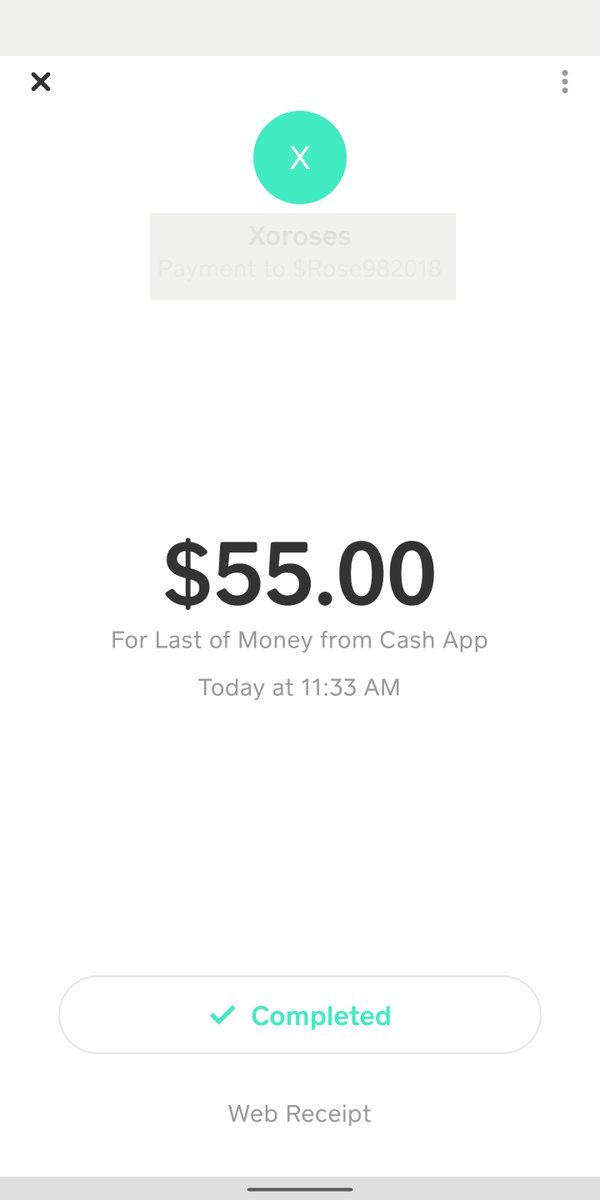
Example of a Good vs. Bad Screenshot:
(Bad Screenshot): Shows full Cashtag, full name, account balance, and transaction ID.
(Good Screenshot): Only shows the transaction amount, type, date, and a partially obscured Cashtag.
Best Practices for Cash App Screenshot Sharing:
- Always prioritize privacy. Think twice before sharing any screenshot.
- Use editing tools to enhance privacy. Don't rely solely on cropping.
- Only share with trusted individuals or authorized parties.
- Report any suspicious activity to Cash App support immediately.
Conclusion:
Creating a perfect Cash App screenshot involves a balance between providing sufficient proof and protecting your sensitive information. By following these steps, you can share the necessary information while maintaining your privacy and security. Remember, your personal data is valuable, so always prioritize its protection. Have questions? Leave a comment below!

