Cornrow Ponytail Braids: A Step-by-Step Guide to Stylish Braids
Are you looking for a protective hairstyle that's both stylish and practical? Look no further than cornrow ponytail braids! This versatile hairstyle is perfect for any occasion, from a casual day out to a special event. This comprehensive guide provides a step-by-step tutorial, along with tips and tricks to achieve the perfect cornrow ponytail braids.
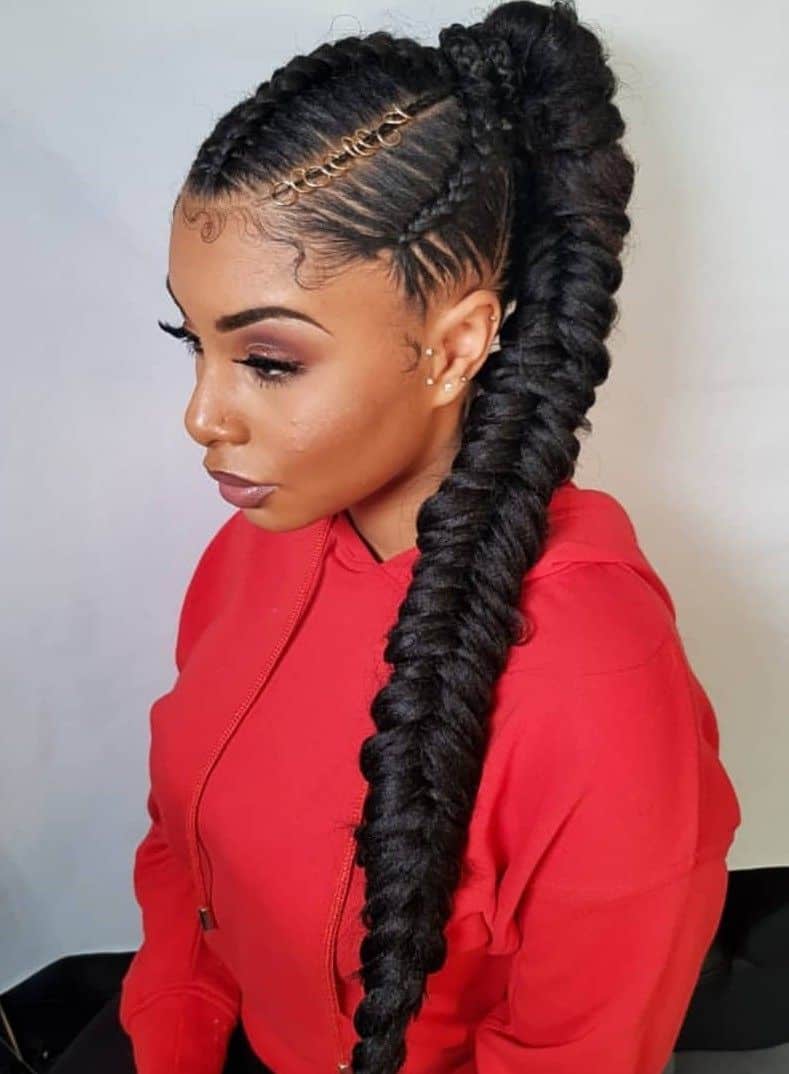
What are Cornrow Ponytail Braids?
Cornrow ponytail braids combine the classic cornrow braid with a chic ponytail. This protective style keeps your hair neatly tucked away while showcasing a trendy, modern look. They’re incredibly versatile, suitable for various hair lengths and textures, and offer a level of customization that allows you to express your personal style.
Benefits of Cornrow Ponytail Braids:
- Protective Styling: Keeps your hair neatly braided, minimizing breakage and damage from daily manipulation.
- Low Maintenance: Once installed, they require minimal daily upkeep.
- Versatile: Suitable for various occasions and can be dressed up or down.
- Long-lasting: Can last for several weeks with proper care.
- Stylish and Trendy: A fashionable and modern protective hairstyle.
Step-by-Step Guide to Cornrow Ponytail Braids:
Before you begin, you'll need the following:
- Hairbrush: To detangle your hair thoroughly.
- Rat-tail comb: For creating neat parts.
- Hair ties: To secure the braids and ponytail.
- Hair gel or edge control: For a smooth, sleek finish.
- Hairspray (optional): For extra hold.
Step 1: Prep Your Hair
Start with clean, detangled hair. Apply a leave-in conditioner or moisturizing cream to keep your hair hydrated and manageable.
Step 2: Section Your Hair
Divide your hair into sections, depending on the desired thickness of your cornrows. The more sections, the thinner the braids. Generally, smaller sections create a more intricate look.
Step 3: Begin Braiding
Starting from the hairline, begin braiding each section into a cornrow. Keep the braids tight and neat, ensuring all hair is included. Use your rat-tail comb to create clean parts and keep the braids straight.
Step 4: Continue Braiding
Continue braiding each section until you reach the nape of your neck.
Step 5: Secure the Ponytail
Once all sections are cornrowed, gather the ends of the braids and secure them with a hair tie to create a ponytail.
Step 6: Finishing Touches
Use hairspray (optional) for extra hold and shine. You can also use hair gel or edge control to smooth down any flyaways for a polished finish.
Tips and Variations:
- Experiment with braid patterns: Try different cornrow patterns like straight-back, zig-zag, or curved cornrows for a unique look.
- Add beads or accessories: Incorporate beads or other hair accessories to enhance the style.
- Consider hair extensions: If you have shorter hair, consider using hair extensions to achieve the desired length for the ponytail.
- Maintain your braids: Keep your scalp clean and moisturized to avoid dryness and itchiness.
Maintaining Your Cornrow Ponytail Braids:
To prolong the lifespan of your cornrow ponytail braids, follow these tips:
- Sleep with a satin scarf or bonnet: This will protect your braids and prevent frizz.
- Avoid excessive manipulation: Don’t touch or pull at your braids unnecessarily.
- Keep your scalp moisturized: Use a moisturizing scalp oil to prevent dryness.
- Wash your hair gently: When washing, use a sulfate-free shampoo and condition thoroughly.
Conclusion:
Cornrow ponytail braids offer a stylish and practical protective hairstyle that’s perfect for showcasing your personality. With this step-by-step guide and helpful tips, you can confidently create this beautiful and versatile look at home. Ready to try this trendy hairstyle? Let us know in the comments below!
Keywords: cornrow ponytail braids, cornrows, ponytail braids, protective hairstyles, braided hairstyles, step-by-step guide, DIY hairstyles, hair tutorial, natural hair, black hairstyles, african american hairstyles, easy hairstyles.

